
9 Practical Tips to Optimize Squarespace for Ecommerce
If you have an eCommerce shop, you want to maximize sales, right? These tips can help you do that by optimizing your Squarespace site. For most online stores, better organization and improved visibility are keys to making more sales.
You want to make sure your site sticks out for the right reasons. We’ve seen new eCommerce businesses, and even ones that have been around a few years, make some rookie mistakes. This article will help you avoid costly mistakes, making your Squarespace site stand out so people can find your products more easily. Not only are these tips practical, but they’re also simple to implement.
Table of Contents in Detail Hide
Tip 1. Add a Promotional Pop-up
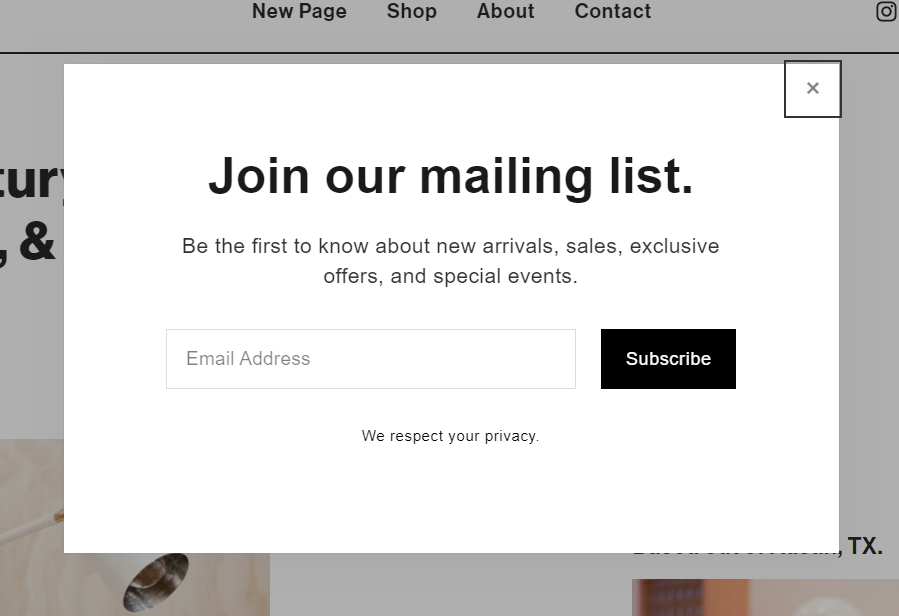
This is essential. Setting up a promotional pop-up benefits you by helping you get some type of buy-in from your visitors. Follow these steps to set up a pop-up on your Squarespace site:
Click on Shop.
Go to Marketing.
Click on Promotional Pop-up.
Follow the detailed steps in our video that walks you through setting up pop-ups.
If you do not have a pop-up with some type of deliverable or promotion, such as, “Get 10% off your first order,” or, “Sign up for our newsletter,” you’re going to struggle to capture attention, since it takes time for people to reach a purchasing decision. Typically, they need to see something multiple times before making that decision to buy.
Yes, it is a premium feature, but you do want to include a promotional pop-up if you’re running an eCommerce store. Are pop-ups annoying? They can be, but at the same time, they’re highly useful, and it’s in your best interest to use them.
Tip 2. Use Item Categories
What are categories? In Squarespace, they are the different groupings on your shop page. For example, if you sell books, your categories might be Fiction, Nonfiction, Self-Help, How-To, Children’s, Teens, Travel, Reference, and others.
Using categories and leveraging them properly keeps your site organized, helping visitors find what they’re looking for more easily.
Squarespace has done a great job of allowing you to use categories and subcategories to keep your products well organized.
As your product line grows, you can add new categories and subcategories to group and list items more effectively. As you set these up, here are a few things to keep in mind:
When you hit Edit on the shop page, you’ll be provided with different options.
These options include a useful Manage Items feature.
When you set up categories, you have the option to organize them within a sidebar or on top.
Squarespace provides great resources to help site developers and eCommerce store owners set up categories the right way. Read through this material and, as always, feel free to contact us for a quick consultation if you get stuck.
Tip 3. Add Discounts
Many eCommerce store owners overlook this tip, or they don’t use it until they think they need it. You’re best off to add a few key discounts from the start. Here’s how to set up discounts:
Go to Commerce.
Click on Discount.
From here, you can set up as many discounts as you want.
Discounts come in many different versions. Some are automatic, while others apply during limited sales periods. You can also create promo codes your buyers can use at checkout. To start with, set up separate discount codes for new customers and for abandoned carts. Over time you’ll be creating many other promo codes.
If a visitor abandons their cart, this action can trigger Squarespace sending them an email with a discount promo code to motivate them to go back and complete their purchase. This is fairly simple to set up and can boost your sales.
Tip 4. Set Up the Announcement Bar
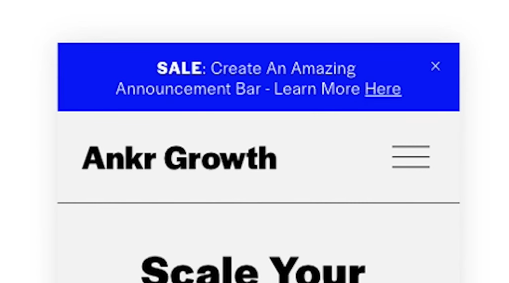
This is a useful, attention-grabbing tool that you can use periodically or regularly. To set it up, follow these steps:
Go to Marketing.
Click on Announcement Bar.
Enable the Announcement Bar.
Add your customized content.
What is this, exactly? It’s one of the top favorite tools that, when enabled, shows up at the top of your Squarespace eCommerce site. You can add whatever brief message you like here. These are just a few suggestions:
Announce complimentary shipping
Include a discount code for orders over $50
Announce a new product line
We’ve created a video that shows you how to easily set up your announcement bar, so be sure to check it out.
Tip 5. Update Product Status
Doing this can add a sense of urgency to your store and your products. If visitors see that only a few items are left in stock for a product they’re interested in, this may motivate them to purchase. Try the following:
Go to Commerce.
Click on Product Status.
Change the text in the dropdown.
You can set up different types of products statuses.
You have different options at your disposal as you create your status. These are just some of the statuses you can set up:
Out of stock
Sold out
Limited availability
Currently available
Only 3 left in stock
And so on
Tip 6. Automate Shipping

Image Source: Unsplash
In your Squarespace eCommerce store, you have two shipping options available: Standard Price (aka flat rate) or Automated. We recommend using automated because it calculates shipping costs. Take these steps:
Go to Commerce.
Click on Shipping.
Several options exist for automated shipping; select the one that works best for you and set it up.
If you choose FedEx, for example, different options come up, such as:
Standard overnight
Express saver
And others
Select the option that works best for you and your business. You can do a small markup for costs associated with the time and effort it takes you to package and ship items. Automated shipping is the way to go! Rarely is a standard flat rate in your best interest.
Tip 7. Include a Shipping & Returns Page
This is a big one that people often miss. Somewhere on your site, you need a very clear shipping and returns page. At the bottom of each page of your eCommerce site, include a link to that page.
If a visitor can’t easily find the important details about how your business handles shipping and product returns, they may leave without making a purchase.
Make sure your dedicated shipping and returns page is easily accessible in the footer of your Squarespace site. That’s where people expect it to be.
Then on the page itself, describe your shipping process in as much detail as possible. Be clear and keep it simple. Explain how shipping and returns are handled in the U.S. and overseas, if applicable. Talk about shipping speeds. Be transparent and honest; customers appreciate that.
Tip 8. Turn on Related Products & Reviews

Image Source: Unsplash
Your customers will have a broader buying experience available to them when you include the related products feature in your eCommerce site.
Go to Commerce.
Turn on Related Products.
Select the title.
Choose how to sort products (e.g. Recently Added, Highest Quantity, etc.)
Save.
Now that you’ve turned on Related Products feature, let’s move on to the Product Reviews feature. This is a new feature now available as part of the Squarespace platform.
Go to Commerce.
Click on Product Reviews.
You’ll find different options.
If you choose Request Reviews, someone ordering from you will automatically receive an email asking them to leave a review.
Options are available for you to set up how reviews appear with your products.
Many people today won’t buy a product until they’ve read about other people’s experiences with it, which makes setting up the Squarespace Product Reviews feature super important.
Tip 9. Set Up a Chat Feature
You’ve probably seen this on other websites – it’s the little icon at the bottom righthand corner that lets you ask questions. Make sure you set up a chat feature on your site. It provides one of the best ways for people to communicate with you and ask questions they need answers to before making the decision to buy your product.
The chat feature helps your customers in a wide range of scenarios, such as:
They’re not sure how else to reach you
They can’t find the specific answer, product, or solution they’re looking for
They can’t locate your contact form
They don’t want to search your site
In our experience, people are far more likely to use the chat feature than search for your contact form, phone number, or email address.
Check out this affiliate link on Tidio to learn more about adding chat to your site.
Bonus Tip: Email Marketing

Image Source: Unsplash
Email marketing is so powerful, and there are two main areas you’ll need to pay attention to on your site.
The first one will be under Commerce and then Customer Notifications. Spend some time reviewing the options available to you for setting up and optimizing these notifications, selecting the ones that work best for your business type, model, and goals. Consider global email styles, business settings, and more as you edit and customize customer notification emails to your liking.
The second area you’ll need to focus on is under Marketing and Email Campaign. Setting up and customizing this section enables you to create automated campaigns about your product offerings to your customer base.
Some Final Thoughts
Optimizing your Squarespace eCommerce site in the ways we’ve covered in this article will help you create a better user experience for your visitors while increasing the likelihood they’ll purchase from you.
In addition to the tips we’ve already discussed, here are a few more things to keep in mind:
Always include a contact form for your customers’ convenience.
Have a FAQ page for customers who like to do their homework before making a purchase.
Provide multiple ways for people to contact you: contact form, email address, and (when applicable), phone number.
We have a ton of free resources available to help developers and business owners alike come up to speed quickly on the Squarespace platform. The faster you learn the time-saving tips and tricks, the quicker you can get your online presence created, and the faster you can start earning money. We offer these free resources for you to benefit from:
Instructional guides on a wide range of relevant topics
A free newsletter delivered to your inbox every month
A powerful SEO audit tool to evaluate your Squarespace site